Overview
What is a permission in HERON
Everything that an employee can see and access is based on his/her permissions. Administrators can add and remove permissions of employees, or even set up dates when a certain access will be valid.
Types of permissions
Permissions related to all active HERON modules (Attendance, Hotline) and for any level of access (basic employee access, manager, administrator, technical account), for example:
- a permission to access and create own attendance requests (applicable for most HERON users)
- a permission to approve attendance requests of subordinates (for managers)
- a permission to edit attendance settings or create new employees and edit their personal data (for Administrators) etc.
You can also see more details & description of all available permissions in a separate manual.
How to add or remove permissions
a) Employee permissions section – adding/removing of permissions for multiple employees at once.
b) Default permissions – permissions will be added with a new account automatically when the new account is created.
c) Employee´s profile – it is possible to individually add permissions via employee detail, for example right after creating a profile for the new employee.
Please be aware that only employees granted with administrator permissions can set up this functionality
Employee permissions section
Step 1 – Organization
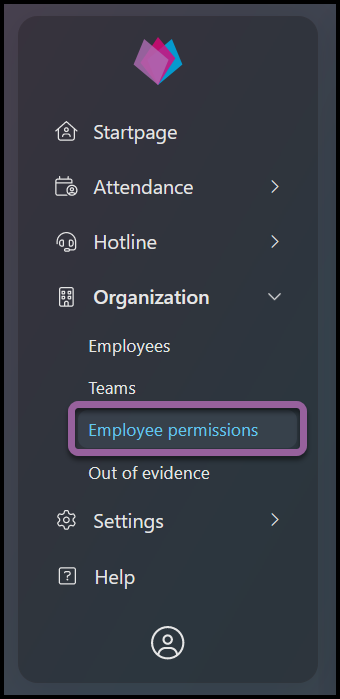
Click on Organization and select Employee permissions.
Step 2 – Select company & employees
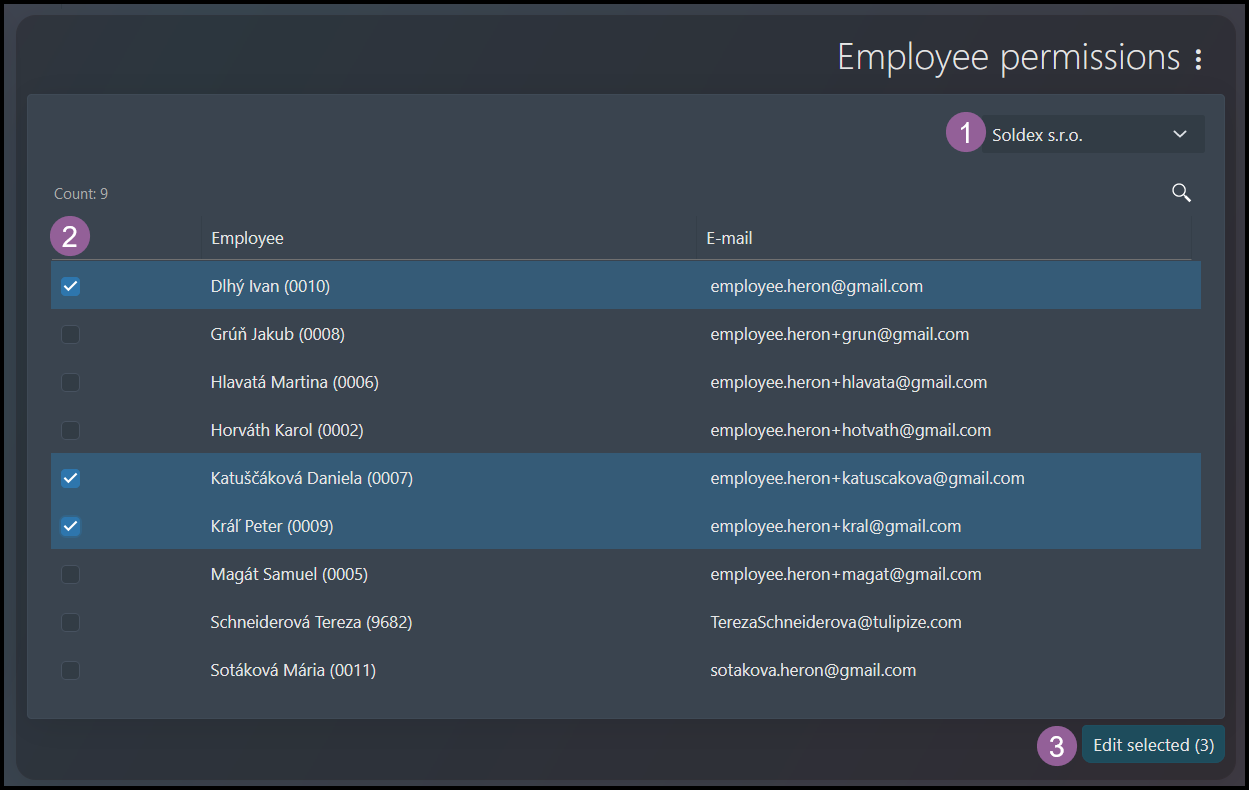
If you have access to employees in more than one company, you must first select a Company.
Tick the checkbox next to a selected employee´s name (or click directly on the name of the employee to edit only his/her own permissions).
Click Edit selected.
Step 3 – Permissions
Add permissions
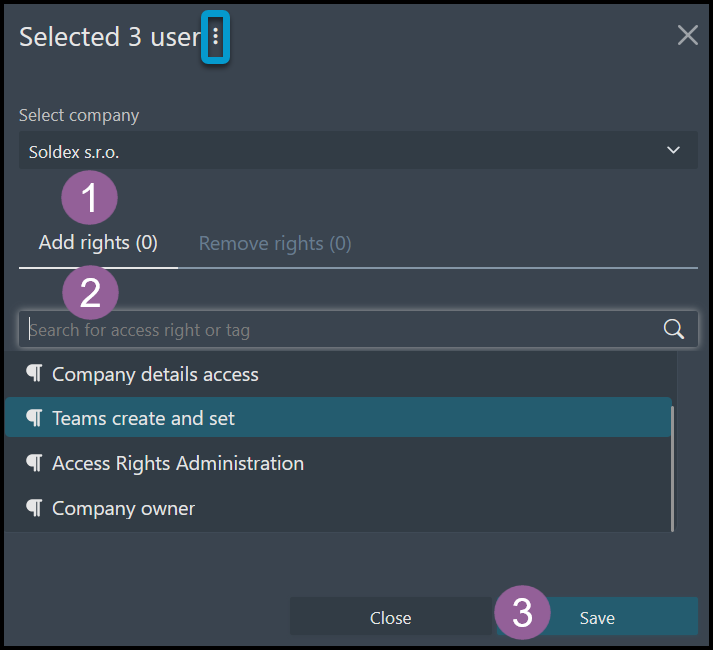
1) Now, you are in the Add permissions tab.
2) Select a permission type: For example, most employees will need a permission called “Attendance access for employees“.
If you want to set up different dates for validity of permissions, select the three dots icon on the top of the screen. The option to choose dates will display. Select “From” (for example, 1st day of the next month) and “To” (for example the end of the month).
3) Click Save.
- Employees who did not have the permission are now granted with the access.
- Employees who already had those permissions will not notice any change in their access.
Delete permissions
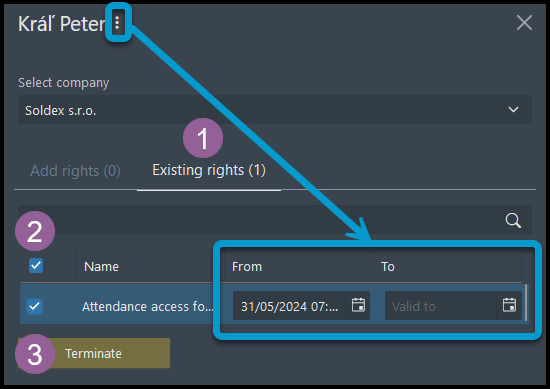
1) Click on Existing permissions tab.
2) Find the desired permission.
3) If you want to end the permission now:
- Tick the checkbox.
- Click Terminate.
- Employees who had the permission now do not have the access.
- Employees who did not have those permissions will not notice any change in their access.
If you want to set up different dates for validity of permissions, select the three dots icon on the top of the screen. The option to choose dates will display. Select “To” (for example the end of the month). If you only set up the dates, click Save (not Terminate).
Click Save.
Step 4 – Confirmation

A small pop-up window displays in the corner of your screen.
Set up Default permissions
Step 1 – Organization
Click on Organization and select Employee permissions.
Step 2 – Select Company & Default

If you have access to employees in more than one company, you must first select a Company.
Click on the three dots icon. Select Default permissions.
Step 3 – Default Permissions
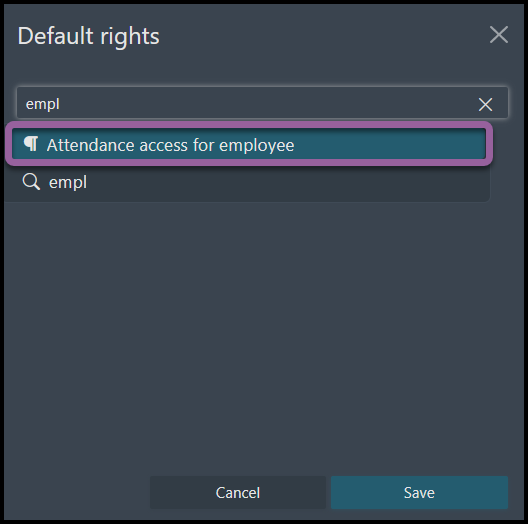
Start typing a permission: For example, most employees will need a permission called “Attendance access for employees“.
Click Save.
- Employees´ profiles created in HERON in the past will not have the permission added.
- New employees will receive this permission automatically right after creating their account.
Step 4 – Confirmation

A small pop-up window displays to confirm changes.
Employee´s profile
Step 1 – Organization

Click on Organization and select Employees.
Step 2 – Select an employee

If you have access to employees in more than one company, you must first select a Company.
Click on the employee´s name.
Step 3 – Go to permissions
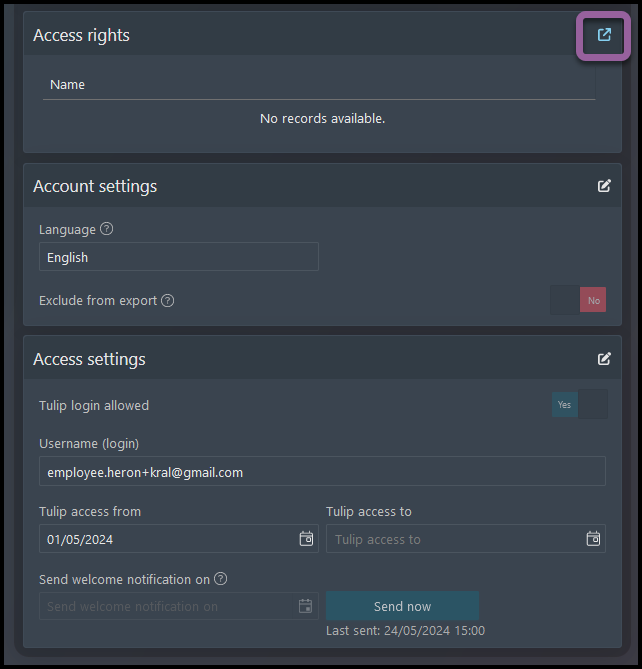
Click on the redirecting icon to go directly into permissions settings.
Step 4 – Edit permissions

Click Edit.
Step 5 – Add / remove permissions
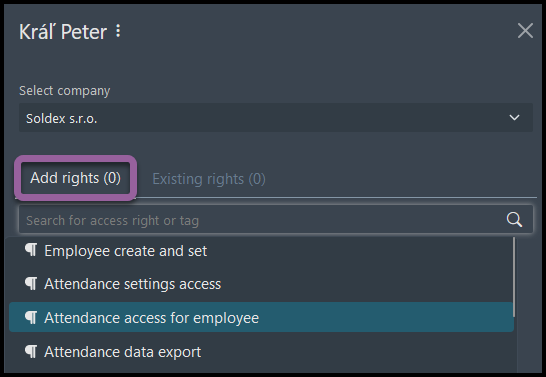
Here you can add (or remove existing) permissions. Search for the name.
Click on the permission you want to add.
The permission will be valid from now – from the moment you click Save button.
Click Save.
Step 6 – Advanced options
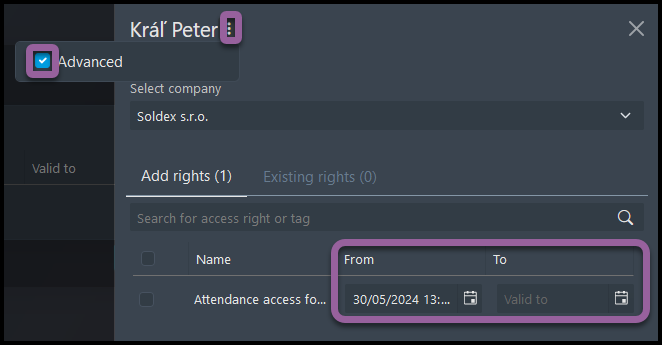
If you want to set up dates from and to, click on three dots.
Select Advanced.
Choose dates.
Click Save.
Step 7 – Confirmation
A small pop-up window displays in the corner of your screen.
- If you added permissions: Employees who did not have the permission are now granted with the access. Employees who already had those permissions will not notice any change in their access.
- If you terminated permissions: Employees who had the permission now do not have the access. Employees who did not have those permissions will not notice any change in their access.