In HERON you can send your manager a request for vacation, home office, sick leave, doctor visit or other types of requests. You will receive an email notification when your request is approved. The request can be edited, moved or deleted under certain conditions.
To see attendance settings from the point of view of an Administrator, go to Admin Attendance settings directly.
New request
Step 1 – Startpage
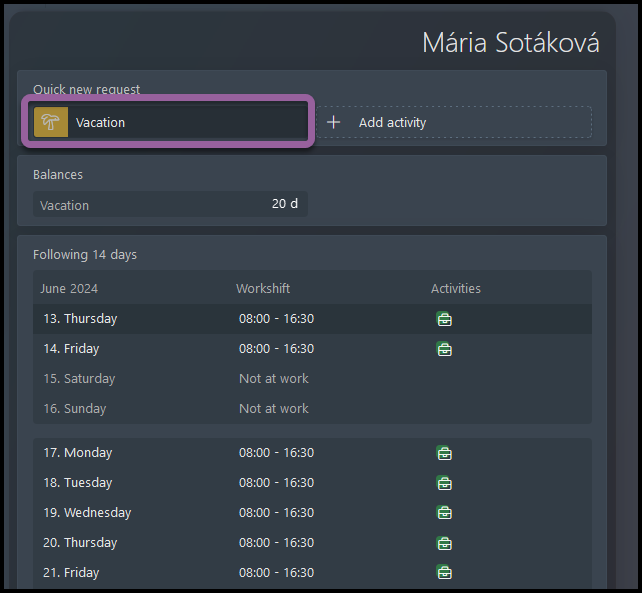
You can create an attendance request directly from your startpage screen.
Click on the icon of desired type of request. If you do not see the type you want, you can go to startpage settings.
Step 2 – Details
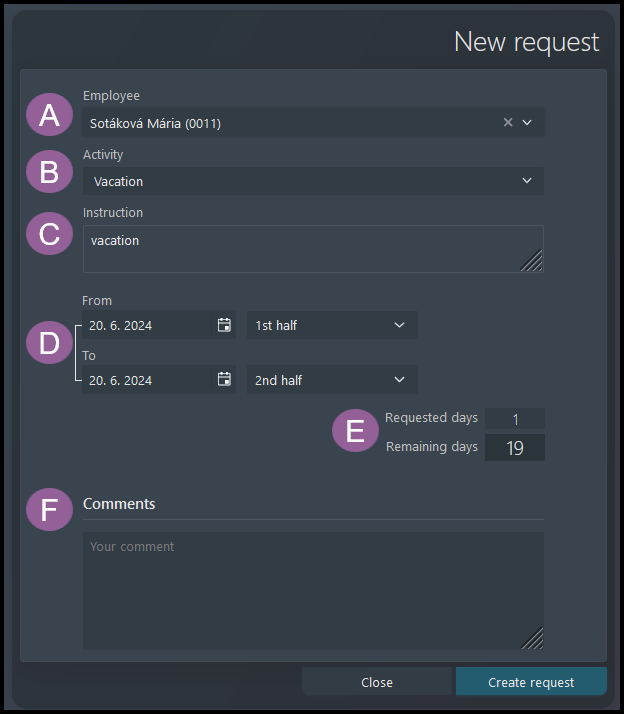
A) Name – usually only managers / administrators can create requests on behalf on another employees and select a different name.
B) Activity – select the activity type (vacation, home office, sick day, doctor visit etc.).
C) Instruction – a free space for some important information regarding the request type.
D) From & To – Click on the calendar icons and select a day and time. Please note that depending on the type of the request, the duration can be listed in hours, half days or days. (For example, to create a half day request that only takes place during the first half of your shift, you can select “From” 1st half and “To” 1st half).
E) The calculation of taken vacation balance and remaining quota. It interactively changes depending on the length of your request:
- Requested days – the amount of all days you will be taking by that request.
- Remaining days – the amount of days that will remain after that request.
F) Comment – an optional field for adding details regarding your request.
Click on the Create request button.
Step 3 – Next steps
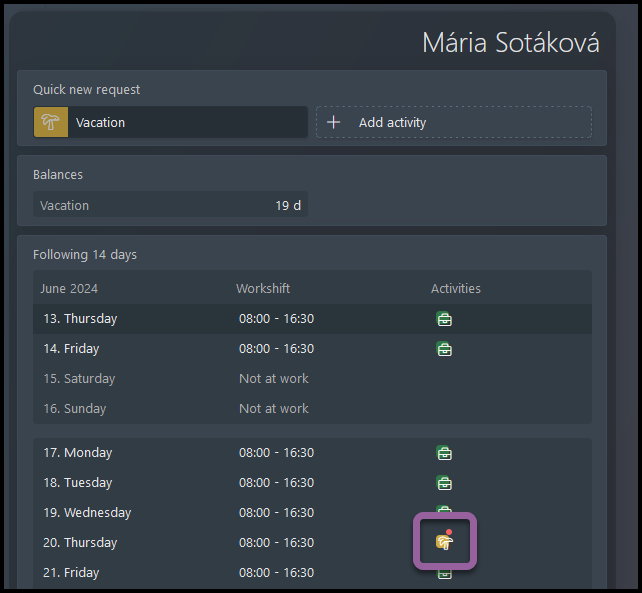
The request is now submitted.
If the request is happening in the following 14 days, you will see an icon in your startpage calendar.
The red dot on the icon means the request is waiting for approval. Wait for your manager to approve your request. You will also receive an e-mail notification once the request is approved.
Change / edit / delete request
Employee can send an updated request for a manager´s approval.
If the old one was approved by the manager already, the manager musts approve or reject the new, updated request once again.
Step 1 – Find the request
There are three ways to access the request: Startpage, Timesheet or Overview.
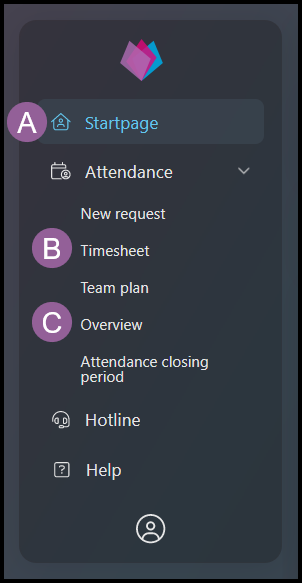
A) Startpage

If the request is happening in the following 14 days, you will see an icon in your startpage calendar. Click directly on the icon.
B) Timesheet
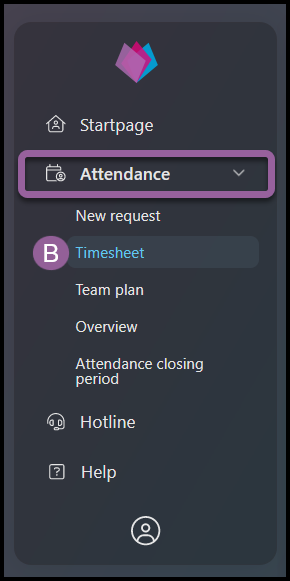
Click Attendance – Timesheet to display a full calendar with a default view of current month.
Then, click on the desired request.
C) Overview
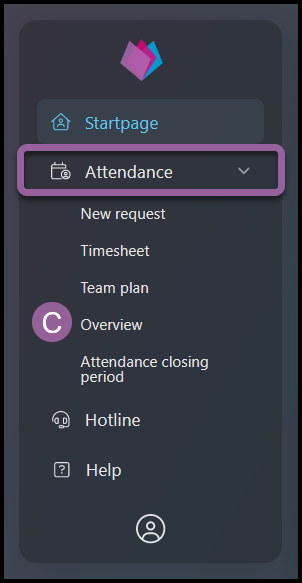
Click Attendance – Overview.
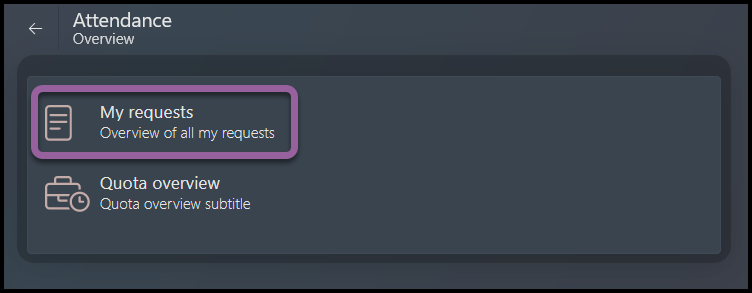
Select My requests option. This view displays a full list of all your requests.
Then, click on the desired request.
Step 2 – Edit Details
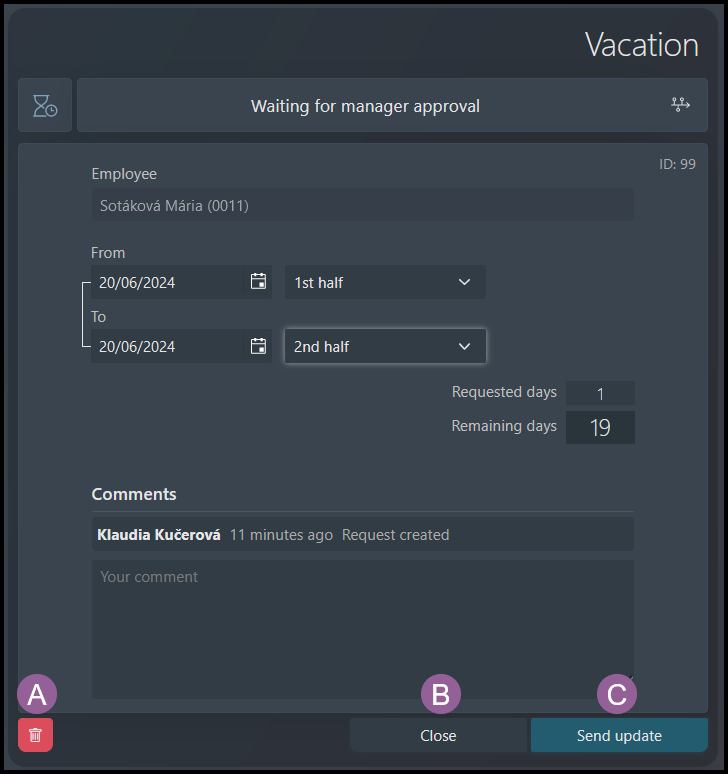
You can choose to:
A) Delete a request – click on the bin icon.
B) Leave the request without changes – click Close.
C) Edit dates / time / comment:
- To change date & time, click on the calendar icons and time fields. Please note that depending on the type of the request, the time fields can be in hours, half days or days. The calculation of taken vacation balance and remaining quota interactively changes depending on the length of your request
- Comment – an optional field for adding details regarding your request.
- You cannot change the employee or activity type – delete this request and create a new one.
Click Send update.
Step 3 – Next steps
The request is now sent for approval.
You may see a change in the icon in your startpage calendar (if the previous or current request is happening in the following 14 days).
The red dot on the icon means the request is waiting for approval. Wait for your manager to approve your request. You will also receive an e-mail notification once the request is approved.